Running Cinnamon Using an AWS Selenium WebDriver Server
If you want to run your own Selenium servers for Cinnamon testing, we recommend using products like SauceLabs and BrowserStack that primarily host Selenium virtual machines. However, Cinnamon doesn't require a magic Selenium WebDriver server. In this post we'll show you how to run Cinnamon tests using a Selenium WebDriver server hosted in AWS.
We'll assume you're familiar with running VMs in an AWS environment and that your environment satisfies the following prerequisites:
- AWS access key ID
- AWS secret access key
- AWS PEM file
- A security group with ports 22 and 4444 open
Tom Romano wrote this excellent post explaining how to set up a server using Vagrant. Our examples borrow heavily from his script but with software updated to the most recent versions (you might need to perform these updates as well). After reading the above post, you can use the following Vagrantfile and setup.sh:
    # Vagrantfile

    Vagrant.configure("2") do |config|
      config.vm.box = "precise64"
      config.vm.box_url = "http://files.vagrantup.com/precise64.box"
      config.ssh.forward_agent = true

      config.vm.provider :aws do |aws, override|
        # Overrides VirtualBox configuration to use empty box as will load AMI below
        override.vm.box = "dummy"
        override.vm.box_url = "https://github.com/mitchellh/vagrant-aws/raw/master/dummy.box"
        # Export as an environment variable or replace this with yours
        aws.access_key_id = ENV['AWS_ACCESS_KEY_ID']
        # Export as an environment variable or replace this with yours
        aws.secret_acces_key = ENV['AWS_SECRET_ACCESS_KEY']
        # The name of the Keypair instance to use
        aws.keypair_name = 'webdriver'
        # Ubuntu 12.04 64bit precise instance backed
        aws.ami = 'ami-aa941e9a'
        # Override default AWS region
        aws.region = 'us-west-2'
        # Path to my amazon .pem file
        override.ssh.private_key_path = ENV['AWS_PEM_FILEPATH']
        # The name of the security group preconfigured in AWS with port 22 and 4444 open.
        aws.security_groups = ['webdriver']

        # Tags that help you easily identify these elements in the test console.
        aws.tags = {
          'Name' => 'vagrant-webdriver',
          'webdriver' => true
        }
      end

      # Tells Vagrant to run setup.sh when the shell is available
      config.vm.provision :shell, :path => "setup.sh"
      # Tells vagrant to make the VM port 4444 accessible on host port 4444 (only works for VirtualBox provider)
      config.vm.network :forwarded_port, guest:4444, host:4444

    end
  # setup.sh

  #!/bin/sh
  set -e

  if [ -e /.installed ]; then
    echo 'Already installed.'
  else
    echo ''
    echo 'INSTALLING'
    echo '----------'

    # Add Google public key to apt
    wget -q -O - "https://dl-ssl.google.com/linux/linux_signing_key.pub" | sudo apt-key add -

    # Add Google to the apt-get source list
    echo 'deb http://dl.google.com/linux/chrome/deb/ stable main' >> /etc/apt/sources.list

    # Update apt-get
    apt-get update

    # Install Java, Chrome, Xvfb, and unzip
    apt-get -y install openjdk-7-jre google-chrome-stable xvfb unzip firefox

    # Download and copy the ChromeDriver to /usr/local/bin
    cd /tmp
    wget "http://chromedriver.storage.googleapis.com/2.12/chromedriver_linux64.zip"
    wget "http://selenium-release.storage.googleapis.com/2.44/selenium-server-standalone-2.44.0.jar"
    unzip chromedriver_linux64.zip
    mv chromedriver /usr/local/bin
    mv selenium-server-standalone-2.44.0.jar /usr/local/bin

    # Ensure that running 'vagrant provision' doesn't redownload everything
    touch /.installed
  fi

  # Start Xvfb, Chrome, and Selenium in the background
  export DISPLAY =:10
  cd /vagrant

  echo "Starting Xvfb..."
  Xvfb :10 -screen 0 1366x768x24 -ac &

  echo "Starting Google Chrome..."
  google-chrome --remote-debugging-port=9222 &

  echo "Starting Selenium..."
  nohup java -jar ./selenium-server-standalone-2.44.0.jar &
After issuing vagrant up --provider=aws, you can use the public name of your instance to hit the WebDriver server (e.g. http://ec2-54-69-194-100.us-west-2.compute.amazonaws.com:4444/wd/hub) and see the following hub page:
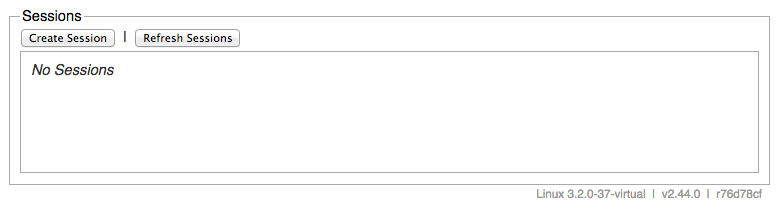
As the last step on the server, click Create Session to ensure everything is running smoothly. Using the above setup.sh, you can create sessions for Google Chrome and Firefox.
Now that the server is up and running, it's time to configure Cinnamon. We'll implement the RemoteWebDriverServiceProvider interface.
global interface RemoteWebDriverServiceProvider {
    /**
     * Implementors return a list of strings representing the supported OS/browser
     * combinations. These strings allow the tester to specify the environment.
     * This list does not contain duplicate entries.
     * @return The list of os-browser combination keys the provider supports
     *         (e.g. "Win 7 IE 9", "IOS8 iPad").
     **/
    List<String> getAvailableBrowsers();

    /**
     * Implementors return a Capabilities instance with the minimal set of required
     * capabilities (browserName, browserVersion, platformName, platformVersion).
     * The Capabilities class provides a constructor with these parameters for
     * conveninence. This Capabilities instance is sent to the remote WebDriver service
     * as the desiredCapabilities parameter.
     * @return An instance of Capabilities with minimal OS and browser capabilities
     **/
    Capabilities getCapabilitiesFor(String environmentKey);

    /**
     * ServiceProviders may need additional settings for full functionality.
     * Implementors must provide a Visualforce page where these additional
     * settings are configured. It's the implementor's responsibility to store
     * this information in the appropriate format.
     * @return A Visualforce page reference for use in the Settings page. This page
     *         loads inside an iframe with a maximum height of 200px
     **/
    PageReference getSettingsPage();

    /**
     * Retrieves the URL for test execution details.
     * @return The URL for test execution details.
     **/
    String getSessionDetailsUrl();

    /**
     * Returns whether or not the provider is configured for use.
     * @return A boolean indicating if the provider is configured for use.
     **/
    boolean isConfigured();
}
We'll implement this interface in a class called AwsSeleniumProvider. Ending a class name with "Provider" is a naming convention that allows Cinnamon to recognize custom providers, so it's important that you include this when you're naming classes. Here's what the class looks like:
global with sharing class AwsSeleniumProvider implements cinnamon.RemoteWebDriverServiceProvider {
    public List<String> getAvailableBrowsers() {
      return new String[] { 'googlechrome' };
    }

    public cinnamon.Capabilities getCapabilitiesFor(String environmentKey) {
      cinnamon.Capabilities caps = new cinnamon.Capabilities();
      caps.set('browserName', 'chrome');
      return caps;
    }

    public String getRemoteWebDriverServiceUrl() {
      return 'http://ec2-54-69-194-100.us-west-2.compute.amazonaws.com:4444/wd/hub';
    }

    public PageReference getSettingsPage() {
      return null;
    }

    public String getSessionDetailsUrl(String sessionId) {
      return null;
    }

    public boolean isConfigured() {
      return true;
    }
}
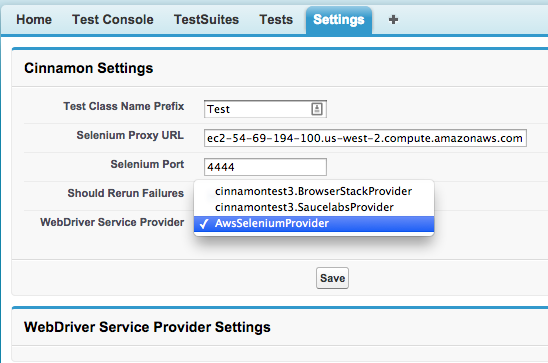
Once you create this class in your Cinnamon organization, navigate to the Cinnamon settings tab to ensure your new provider shows up in the list of WebDriver service providers.
You're ready to run tests on your newly configured server! When you navigate to the Cinnamon Test Console, you'll see the browser you specified in the provider in the browser selection menu. In this example we only included Google Chrome, but you can also set up your environment to run tests using Firefox.
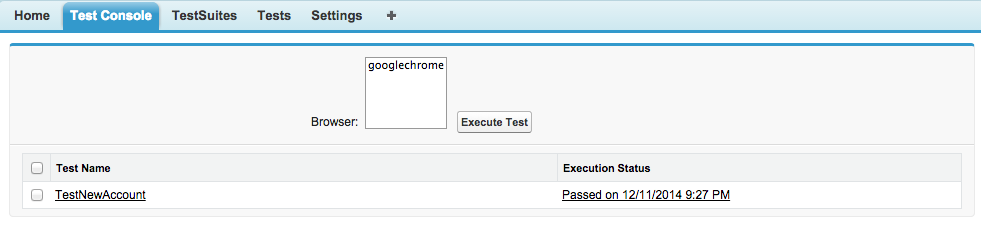
Happy testing!